◙(click images to enlarge)◙

░░▒▓▓
░▒▓ Molly Zara Mullen ▓▒░
░▒ 3D artist & graphics programmer ▒░
░░▒▓▓
☺☻ portfolio // demo reel ☻☺

░░▒▓▓
░▒▓ Molly Zara Mullen ▓▒░
░▒ 3D artist & graphics programmer ▒░
░░▒▓▓
☺☻ portfolio // demo reel ☻☺
This demo reel showcases some of my recent work in tech art and graphics programming. All artwork seen is also by me unless noted. Please see the other portfolio work below, and for business inquiries, contact molly.astral@gmail.com
░▒▓ ░▒▓ ░▒▓
↨ ╠════ ≈≈≈≈≈≈ ♪ ♫ ♪ ≈≈≈≈≈≈ ════╣ ↨
Chiaroscuro, a dreamy lo-fi lighting and shading system
(Unreal Engine 5, custom shading models)
This is a set of custom shading models for Unreal 5 aimed at creating a distinct, retro-inspired visual style that also leverages modern rendering techniques like pixel depth offset, subsurface scattering, and real time global illumination. The core of the effect works by using the deferred light pass to apply ordered dithering to PBR textures and shadow maps in UV/texture space. In other words, all objects shaded by Chiaroscuro will automatically posterize and dither any lights or shadows that touch them. The Chiaroscuro foliage model also dithers the result of its subsurface scattering function.
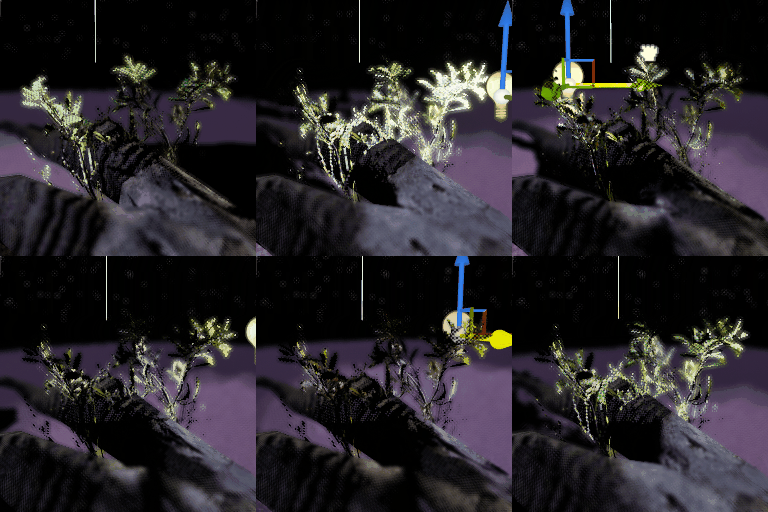
↑ Dynamic dithered shadows and subsurface scattering.
Chiaroscuro also has an unlit shading model used for a custom skybox, which supports a dynamic cloud layer, as well as moons and stars that react to the position of the sun in the sky. The sky can also blur itself in screen space in order to evoke haziness or twinkling stars.
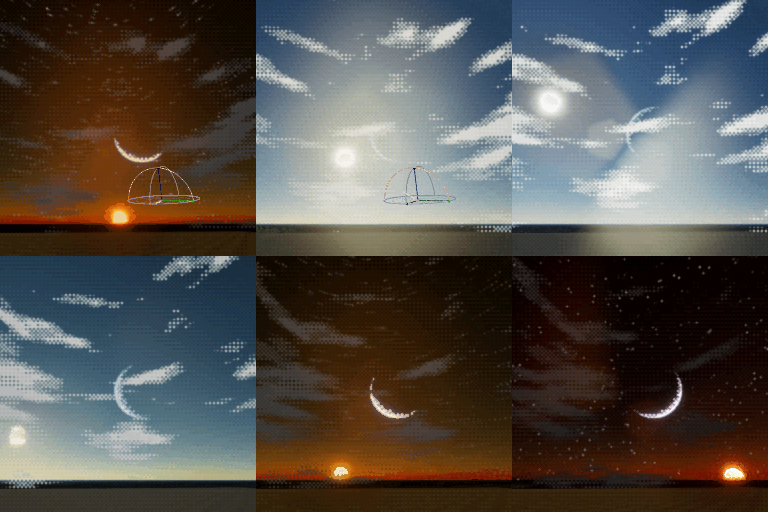
↑ A Chiaroscuro sky reacting to a moving directional light.
I also created a handful of custom post-process effects for use with this system, including a custom depth of field implemenation. These take more visual cues from PS2-era RenderWare games, since the Saturn and PlayStation obviously wouldn't have been able to manage real time depth of field in the same way.
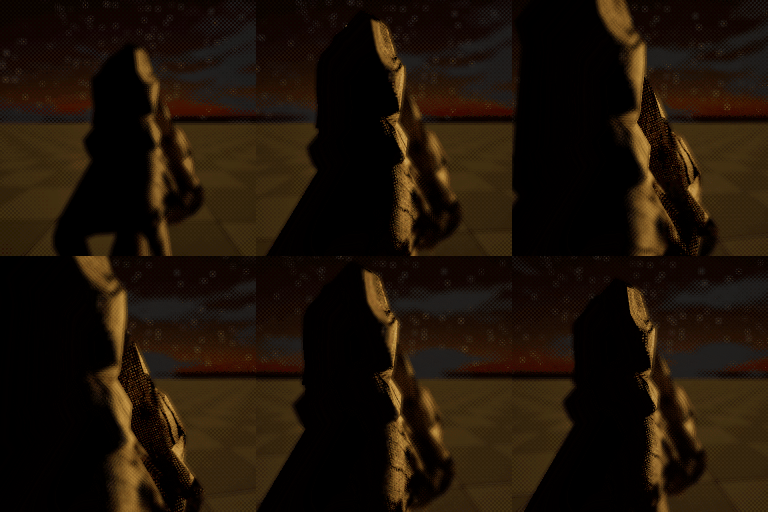
↑ Custom depth of field with a very short focal plane.
This system is written in HLSL, C++, and Blueprint, and has required multiple engine recompiles. Some inspirations include giallo films, retro stylized 3D games like ULTRAKILL and Return of the Obra Dinn, the Final Fantasy Ivalice games (especially Vagrant Story), and cinematic film stocks like Kodak Ektachrome and CineStill 800T. It also borrows some techniques from Sean LeBlanc's Ordered Dither Maker.
░▒▓ ░▒▓ ░▒▓
↨ ╠════ ≈≈≈≈≈≈ ♪♫♪ ≈≈≈≈≈≈ ════╣ ↨
Physically-Based Metal Oxides (Substrate, Unreal Engine 5)
This is a shader I built with the experimental version of Substrate. It simulates metal oxidation in engine, so metallic materials can dynamically rust, tarnish, or acquire a patina. It also works in real time:
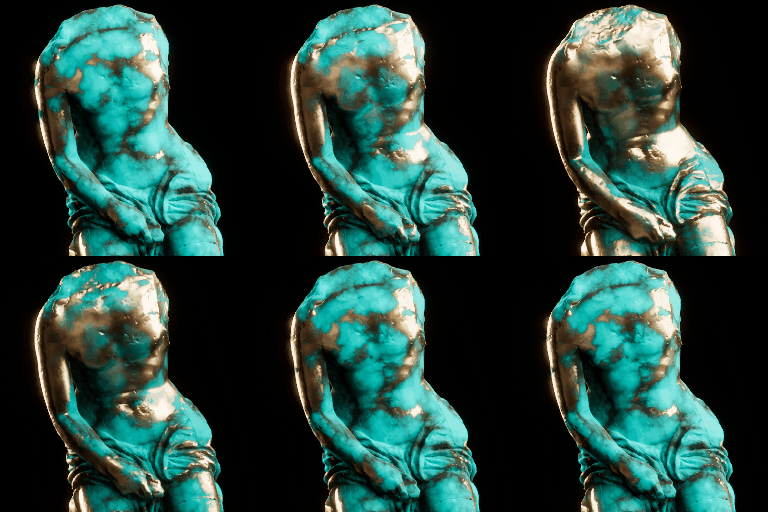
The effect works by blending between two Substrate Slab BSDFs based on the lightness of 3D Perlin noise sampled in world space. This can also be used to generate different patterns of rust depending on an object's position in the world, which is useful for making environments look more natural.
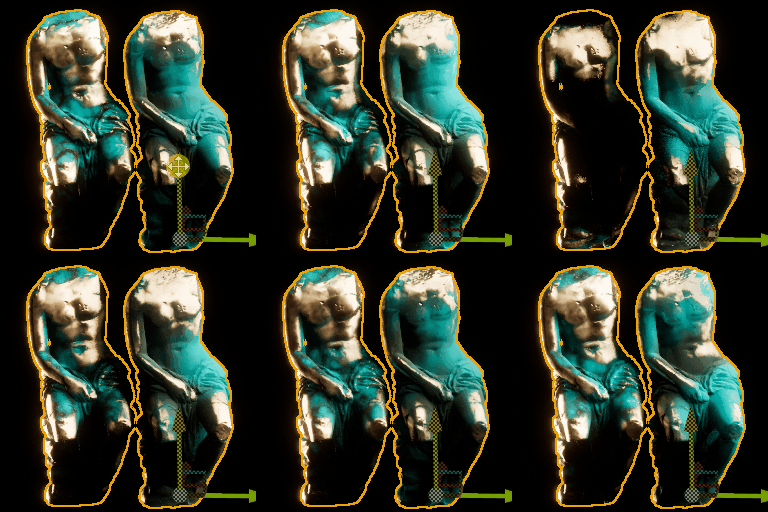
Because of this, this shader can essentially make materials procedurally in engine, with no external software strictly required. The examples on this page use optional Curvature and Ambient Occlusion mesh maps to make the material emphasize the form of the statue.
Interestingly, because this shader is largely physically accurate, it can be used to make "hypothetical" versions of real materials, like rusty tungsten. Under normal circumstance, tungsten only oxidizes when it's extremely hot, meaning it doesn't rust so much as it burns. If tungsten did rust, though, it would probably look a lot like the image to the right, and be covered with a weird, rough indigo scale.
I always love when my shader art lets me do a little bit of fantasy chemistry.
░▒▓ ░▒▓ ░▒▓
↨ ╠════ ≈≈≈≈≈≈ ♪♫♪ ≈≈≈≈≈≈ ════╣ ↨
Ticking UV Panner (Unreal Engine 5)
An effect I built for a friend, who was trying to make a UV panner that scrolled upward in short, intermittent pulses, kind of like a receipt printer or a terminal application with lots of newline characters. This is actually a deceptively tricky problem, because shaders can't keep any persistent states between frames, meaning you can't just increment a value that says "scroll the texture up by this much" in plain shader code, like you might on the CPU. In practice, this limitation means that scrolling effects in shaders usually either scroll endlessly at a fixed speed, or oscillate back and forth between two positions using a sine, as these types of motion are simple to calculate entirely within a shader.
My solution for this problem was actually to update the UV offset every tick using Blueprint. In order to find the right UV offset value for each frame, I derived a pulse sort of timer math function, which works by composing three synchronized sine waves, and adding the function result to a continuously incrementing offset variable. This variable is then passed into the relevant shader as a parameter.
Specifically, the sines used are:
Each tick, the absolute value of is added to the UV offset if is positive and is negative. Otherwise, nothing is added. This causes the UV offset to increase in groupings of short, snappy pulses.
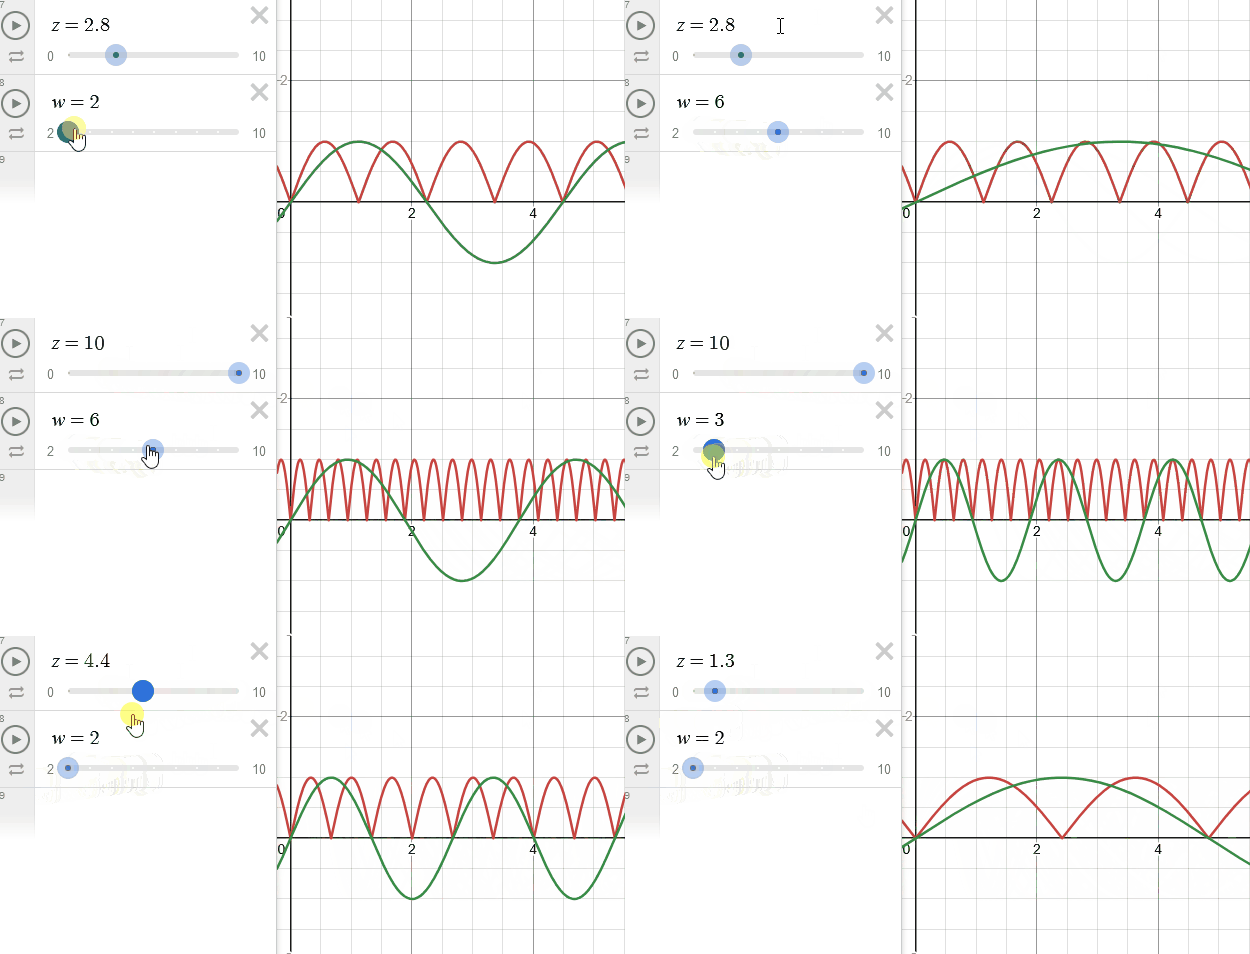
↑ The value of the red function is only counted when the value of the green function is positive.
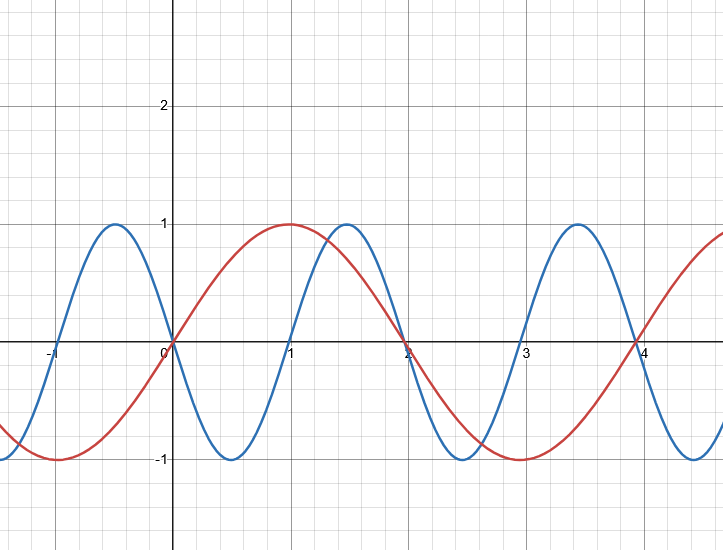
↑ The value of the red function is only counted when the value of the blue function is negative.
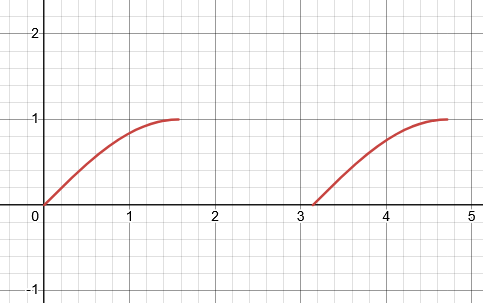
↑ The pulses are made by composing these functions.
░▒▓ ░▒▓ ░▒▓
↨ ╠════ ≈≈≈≈≈≈ ♪♫♪ ≈≈≈≈≈≈ ════╣ ↨
Procedural Rocks (Unreal 5, legacy material system)
This is one of those material effects that's so subtle you barely notice it, but that's also the idea. Basically, every asset seen to the left is textured using one shader, and all texturing is fully procedural in-engine, meaning that no asset-specific textures are required. Any mesh can be fully and realistically textured using a set of standard tiling PBR textures, and these can be swapped out for another texture at any time:
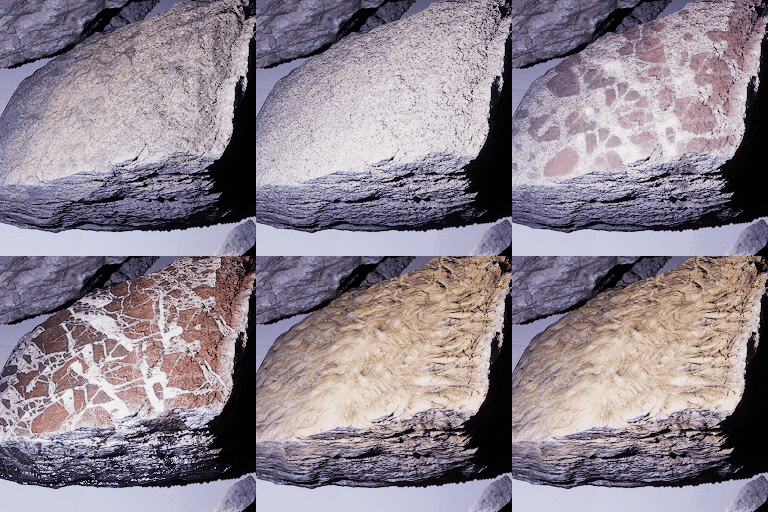
This is accomplished by using a number of different texture projection techniques, including a pared-down and more performant version of triplanar projection. It also uses Unreal 5's distance fields to approximate ambient occlusion for any mesh, which eliminates the need to use asset-specific AO maps. That said, I still included support for bespoke AO maps, since they can produce a better result than distance field AO in many circumstances.
My primary use for this shader has been instantly retexturing Megascans assets to better fit the aesthetics of a scene.
░▒▓ ░▒▓ ░▒▓